Woodwax 22 Clear
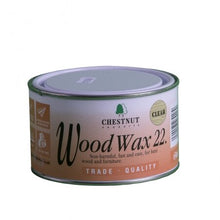
WoodWax 22 contains beeswax (for shine) and carnauba wax (for hardness). Blended together in a solvent to produce a soft creamy paste. This makes it very easy to apply over any surface.
WoodWax 22 is quick drying enough to be applied onto unsealed wood but works best on one of our sanding sealers.
If working on the lathe the wax should be applied with the lathe stopped.
Apply using a cloth (Safety Cloth or Stockinette works well with this); the wax spreads easily over the surface, after about 20 seconds it starts to drag slightly. This means it is ready to buff up; if you haven’t covered the whole piece by then don’t worry, just take a little more wax from the tin and carry on applying, the wax won’t mind waiting!
It’s best to buff WoodWax 22 as soon as you can; that way any surplus wax that might have been applied will be removed, allowing the shine to really show through.
If working on the lathe Safety Cloth should be used for the buffing process and let the lathe do the work for you. Off the lathe Safety Cloth or Stockinette can be used.
A second or even third coat of wax can be applied if required, leaving about twenty minutes between coats. After three coats the finish can become softer and will mark very easily.
Microcrystalline wax
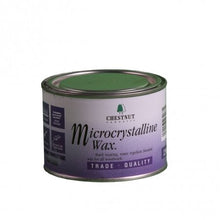
Chestnut Products’ Microcrystalline Wax is a blend of high quality waxes rich in microcrystalline wax – a wax derived from the petroleum refining process and known for the fineness of its crystals.
This is mixed with a special solvent to create a firm wax which, when dry, knits down to form a very dense coating making it very water resistant, meaning that it is ideal for any items that are likely to come into contact with water for short periods of time.
Microcrystalline waxes also have a higher melting point than other waxes traditionally used to make polishing waxes, the benefit of which is that repeated handling of items finished in Microcrystalline Wax won’t finger mark in the same way, as the melting point is higher than normal body temperature.
Microcrystalline Wax should be used over one of the Chestnut Products’ sanding sealers and allowed to dry (about 20 minutes) before buffing to a shine.
For best results apply a very thin coat, spreading the wax evenly over the entire surface.
Microcrystalline Wax can also be used on the Buffing Wheel System. In this situation use the A and B Wheel as normal, then apply the Microcrystalline Wax to the item you are polishing. Allow 20 minutes for the wax to dry then buff and normal using the C Wheel. You can use the same C Wheel for both Microcrystalline Wax and the Carnuaba Wax Stick.
Microcrystalline Wax has been tested to the EN71 Part 3 regulations regarding coatings used on toys
Liming Wax
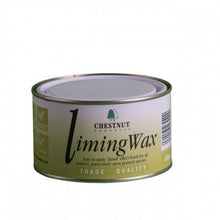
The white pigment in Liming Wax is Titanium Dioxide (TiO2) which gives it a brilliant white finish which will perfectly highlight open grain.
Use Liming Wax on any open grained timber for a dramatic and striking effect which can be emphasised by using a stain or Ebonising Lacquer first.
For an even better result use the Liming Brush first to open up the grain, allowing more Liming Wax to enter; spread the Liming Wax over the whole surface and then wipe off after a few minutes. The Liming Wax will stay in the open grain and the effect will be instantly visible.
Whilst Liming Wax is a wax (obviously!), the wax is mainly a carrier for the white pigment. Therefore an overcoat of some kind is needed. WoodWax 22, Microcrystalline Wax, Finishing Oil or Hard Wax Oil are ideal for this and will lock the wax in place whilst keeping it clean and bright.
Cut’n’Polish
Cut’n’Polish is a blend of two waxes with a fine abrasive held in suspension within them.
This is a soft wax designed to stay ‘wet’ slightly longer during application, allowing it to lubricate the abrasive to give a very fine cut to the timber and also to collect any dust generated during use and some subsequent sanding, preventing it from entering the workshop atmosphere.
On bare wood; sand to 240 grit as normal, apply a coat of Cut’n’Polish with the lathe stopped, then switch on the lathe and buff to a soft sheen whilst smoothing the timber at the same time.
On sealed wood apply after the sealer in the same way, polishing to a slightly higher shine.
Cut’n’Polish dries almost immediately and can be overcoated with Friction Polish or any of our waxes for a higher shine.
Friction Polish
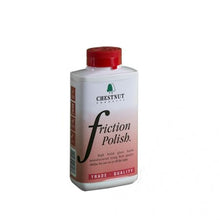
Friction Polish is a shellac based polish ideal for creating a high gloss finish on or off the lathe. It’s a great decorative finish and is ideal for small items but can be difficult to apply to larger items on the lathe (anything over about 8 inch diameter).
The high amount of shellac in Friction Polish does two main things. Firstly it helps seal bare wood and produces a great shine, which is good. Sadly the price of this commodity shot up a few years ago when the shellac crop failed and it never went back down, meaning that the cost of the polish has also risen sharply.
Nevertheless, Friction Polish remains one of the most popular finishes for turners. It can be applied to bare wood but is normally used over a sealer and any of the sealers in the Chestnut Products range are suitable for this.
Applied with the lathe running it dries almost instantly and builds to a deep, rich shine very quickly. Avoid using too much as this can cause ‘rings’ to appear on the surface.
Friction Polish can be applied off the lathe with great success, using it like a French Polish and rubbing it into the surface. This does require a large amount of elbow grease (sadly not something we supply) but the end result is well worth the effort!
Burnishing Cream
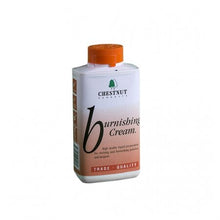
This creamy liquid has a very mild abrasive within it which acts like ‘liquid sandpaper’ on finished surfaces, cutting back and cleaning the finish and elevating it to a glossier, brighter finish.
It can be used to smooth Cellulose Sanding Sealer prior to applying wax or Friction Polish, or, after allowing a suitable time to dry, on any of the lacquers, Friction Polish, Finishing Oil or Hard Wax Oil.
A deep finish can be achieved using Burnishing Cream on a coat of Melamine Lacquer, then a coat of Friction Polish and finally the Burnishing Cream again.
Use it sparingly so as not to over lubricate the surface and be sure to shake the bottle before use.
It is not advisable to use a lacquer on top of a surface that has had Burnishing Cream used on it.
Buffing Wheel Kit
This kit gets you started on the road to buffing – all you need to supply is the lathe, a chuck and something to buff!
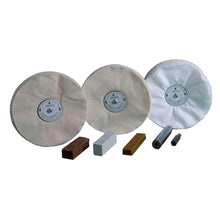
Inside the kit you get the Mandrels for holding the Buffing Wheels in the chuck. One of each Buffing Wheel (A, B and C) are included in the 8 inch size, complete with all the fixings attached to fit into the Mandrels.
A bar of each of the Compounds is included to get you started, these will last a long time so no need to worry about getting spares yet (although all of the items in the kit are available separately when you need to get them).
Next is a stick of Carnauba Wax for that final gloss finish.
Last but not least is a full set of instructions on how to use the kit to get the best from it.
(Note: the wheels are rated for a maximum speed of 1500rpm and designed primarily for use on a lathe. It can be used with a variable speed drill, but the large mandrel will not fit. We’d suggest buying the smaller wheels, the compounds and the Small Mandrel separately, this will be more cost effective).


